If you’re here it means that you’re accomplished with the following configuration steps from my previous blog post, deploying Horizon Connector into your On-Premises infrastructure.
Moving on our configuration, your appliance should be at the following state, according picture below.

Before configure our appliance we need to make two simple (but important) actions:
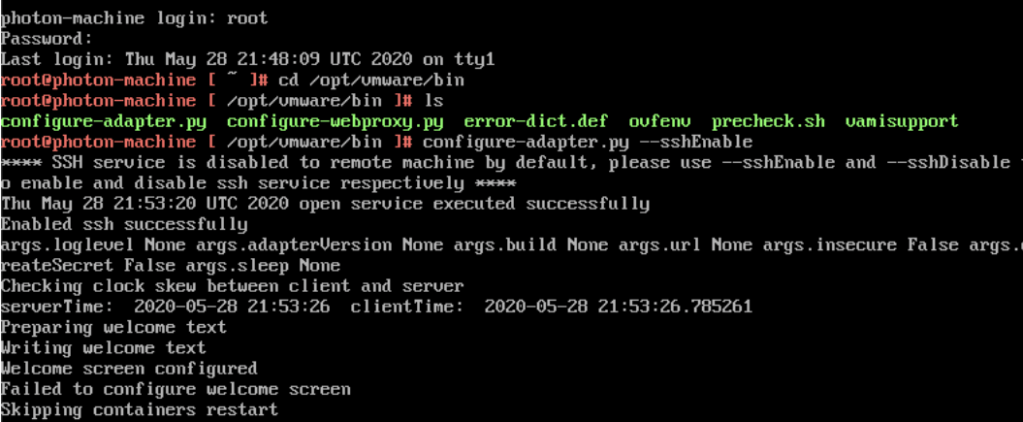
1- Set SSH Access
Logging into your Horizon Connector using the same root password you used during deployment.


Go into /opt/vmware/bin/ folder and run the Python Script configure-adapter.py with –sshEnable option:

2- Run PreCheck scripts
If you’re using Horizon Connector version 1.6 and later, you need to run the PreCheck script into /opt/vmware/bin/ folder with you Horizon Connection Server FQDN Name, according the following link.

3- Configure your Horizon Connector using Web Browser
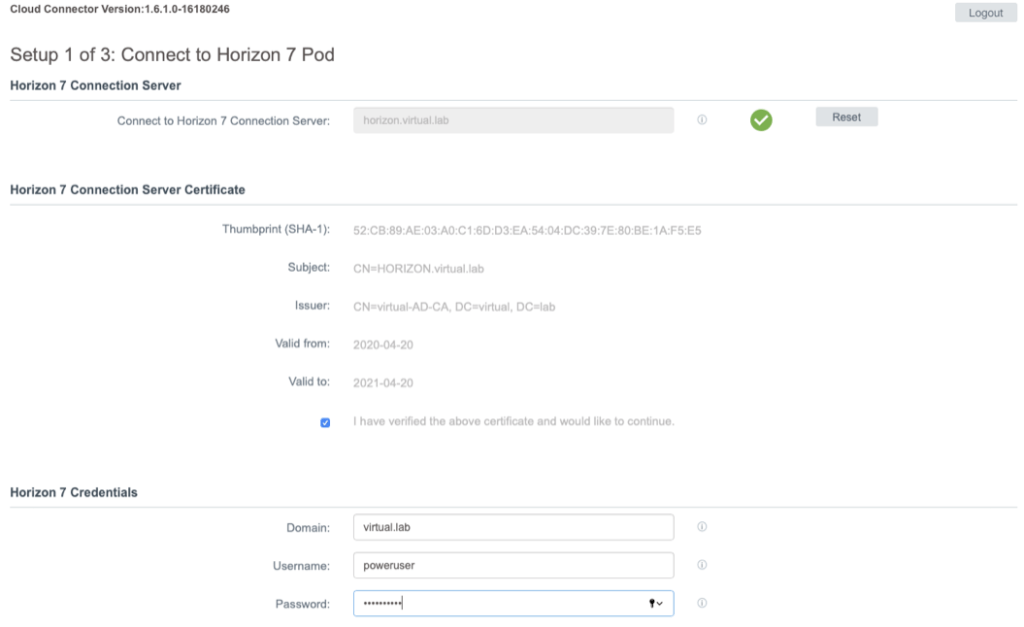
Access your Horizon Connector Web Browser to start configuring it.

The following screen will appear:
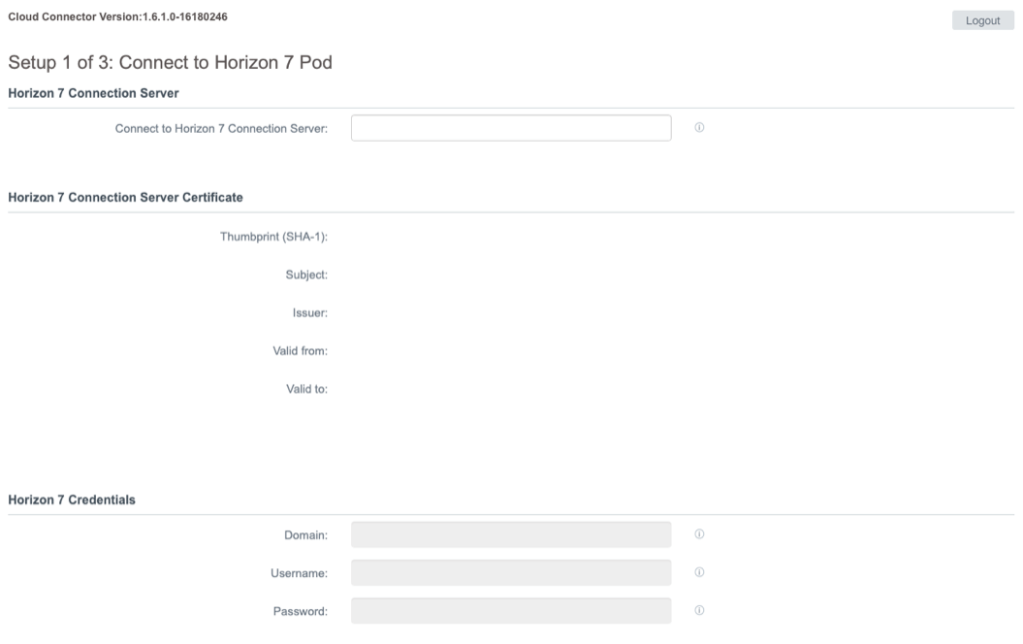
Add with your environment details: Connection Server URL (external or internal), Domain, Username and Password, according privileges written in here.
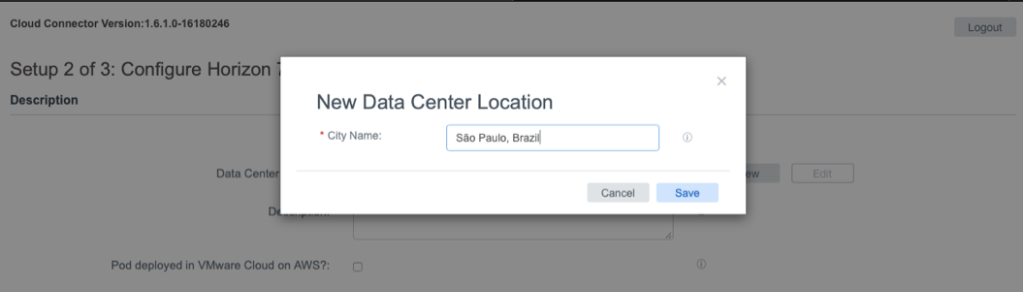
The next screen will ask for a PoD name, which will be a Capacity into Horizon Service Plane:


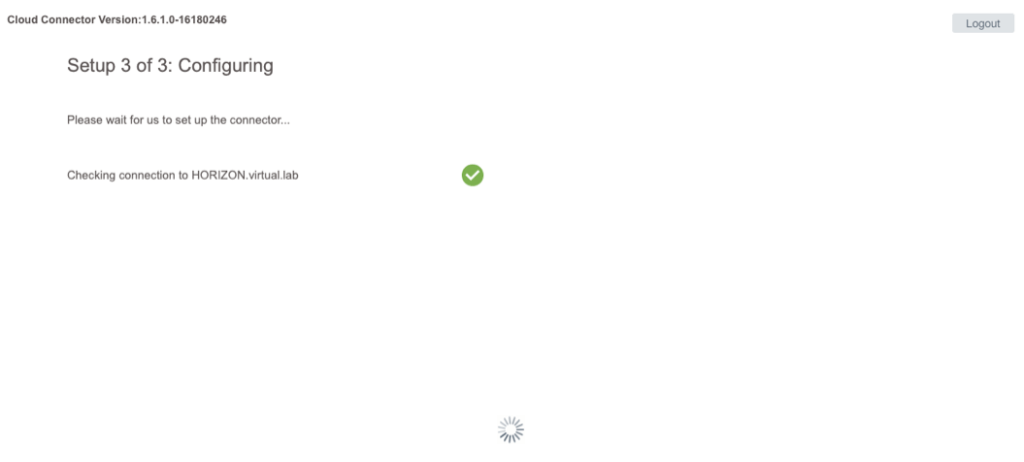
The last step will validate all previous settings and finish Horizon Connector configuration:
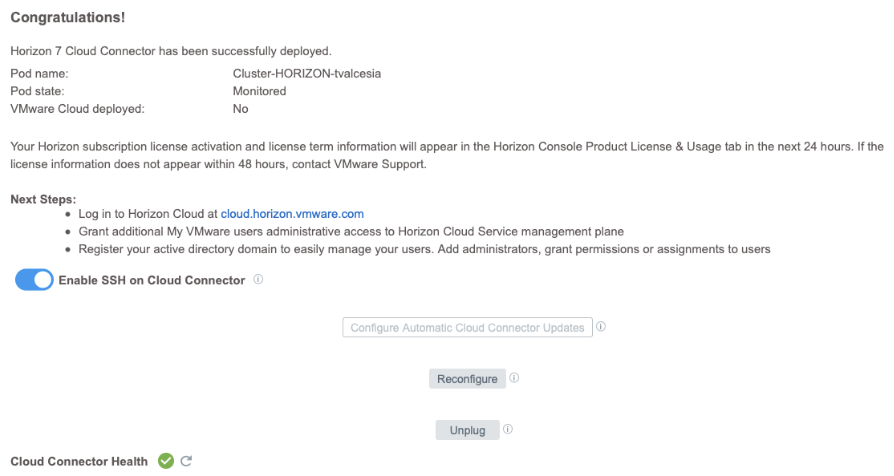
At this point, your license should be changed to Horizon Subscription License.
Note: If this status did not change in 48 hours after this configuration, get in contact with your VMware representative.

4- Finishing Configuration from Horizon Service Plane side
Once your configuration is successfully done from On-Premises side, we need to validate the information and finish Active Directory Bind into Horizon Service Plane.
Log into your environment using https://cloud.horizon.vmware.com/.
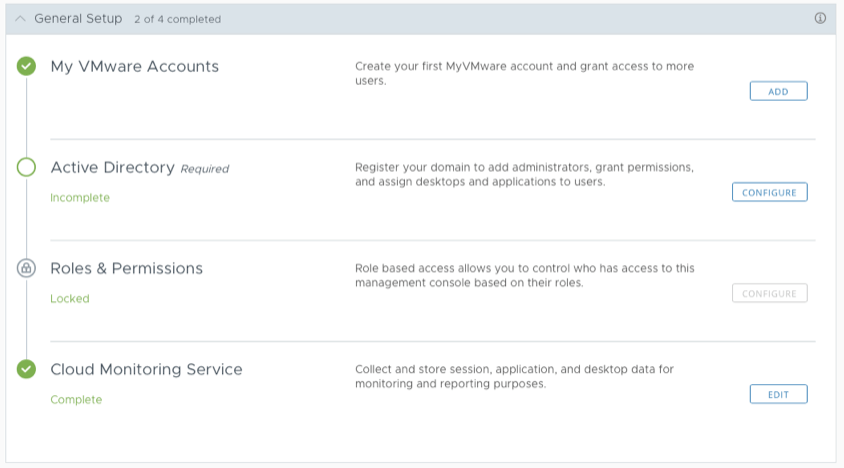
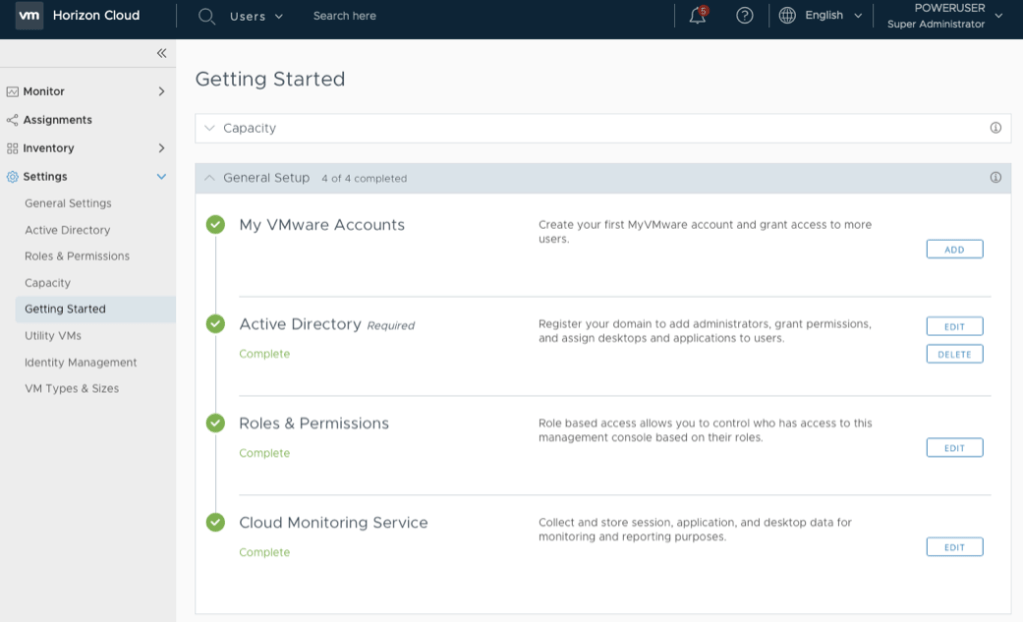
If everything is done successfully from Horizon Connector side, the following page will be displayed and a green mark will be into On-Premises Capacity.

A few steps need to be configured following the Getting Started page:
Add a MyVMware account
You need to add a second MyVMware account or give access to more administrators from your organization. Just type First, Last name and e-mail address corresponding with MyVMware account.
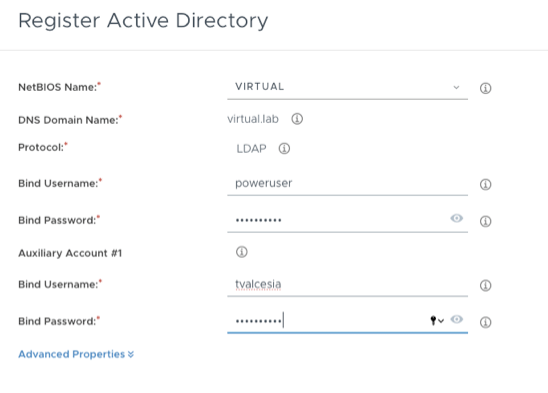
Register your Active Directory
The following page will be displayed:
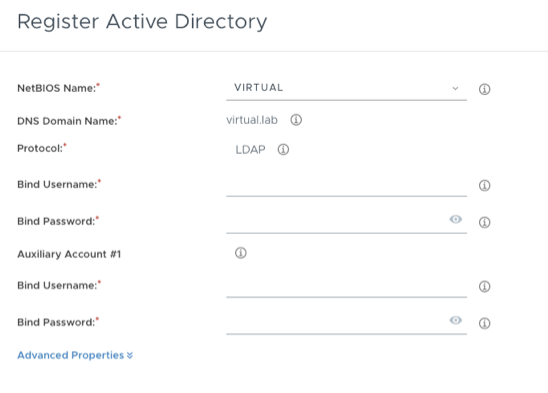
Fill the information properly with Username and Password with corresponding permissions written into this link.
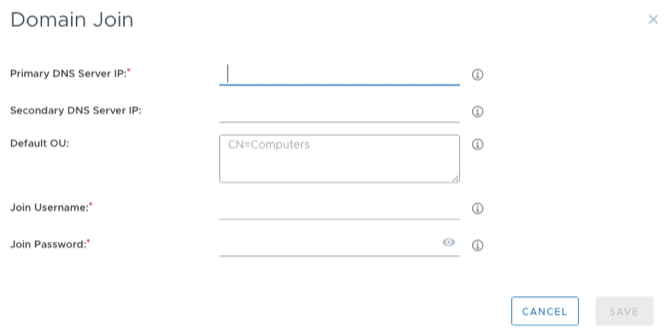
Follow with Domain Join action
Now add your a User Group into administrator group:

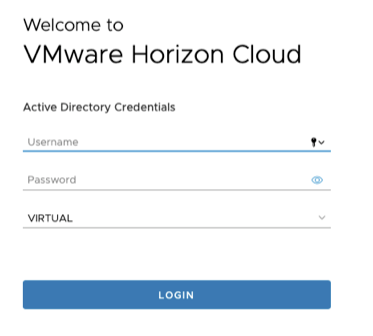
If all configuration were done properly, you will be redirected into login page to validate your Domain Username and Password:
Now all services have been completed and you’re ready to start your new Universal Experience
Enjoy it!

Is there a way to change the tenant that the Horizon Cloud Connector points you to? Or is that something that requires a support ticket for them to do on the backend?
LikeLike
Hi Kathleen. You can change your external FQDN using Universal Broker and Single-Pod Broker using this VMware Docs (https://docs.vmware.com/en/VMware-Horizon-Cloud-Service/services/hzncloudmsazure.admin15/GUID-BE0F7AEA-A4F5-4580-A461-8793FAA61264.html). Now, if you’re referring to Workspace ONE Access tenant, you’ll need to raise a ticket to change to another name. I wish that comments help you.
LikeLike