I have customers which moved into Horizon Universal License, according my previous blog post, and in some cases those customers still need to keep using Horizon On-Premises and come across with the following question: How to configure Horizon Service Plane using my On-Premises Horizon infrastructure?
To make it easier crystal clear, these are the steps you need to do follow:
1- Access Horizon Service Plane
Open https://cloud.horizon.vmware.com and it will asks for your MyVMware account. Remember to log in using the account which has administrator role for this configuration.

If this is your first time access, the following page will be presented to you:
Capacity Scenarios:
- On-Premises
- Add Cloud Capacity

2- Download Horizon Cloud Connector
When you click into On-Premises option, a message will appear asking you to download and install Horizon Cloud Connector into your On-Premises environment.
The following link will be presented to you. We should download this OVA Appliance:
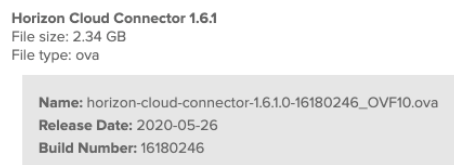
Note: If you receive an error message with no access to download it, use the same My VMware account which received permission to access Horizon Cloud.
Once it’s downloaded, we need to deploy it using vCenter.
3- Requirements Prior Deployment
DNS
- Create a Forward Record
- Create a Reverse Record
- Fixed IP Address
Internet Access – Proxy or Firewall Ports
Proxy
- Proxy Host
- Proxy Port
- Username
- Password
Note: You can change this configuration later, just following this URL.
Firewall Ports
- Review this link with detailed information regarding Firewall Ports and External URLs that need to be configure properly.
- Horizon Connector will only have external access according the following diagram:

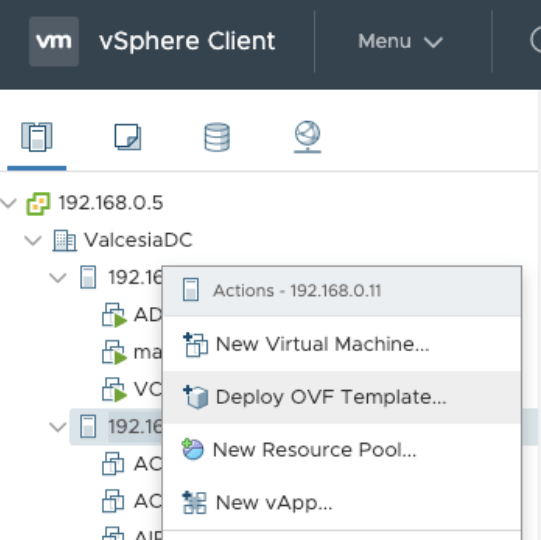
4- Deploy OVF Template
Open your vCenter and right click into your vSphere Hypervisor to start deploying this OVA File
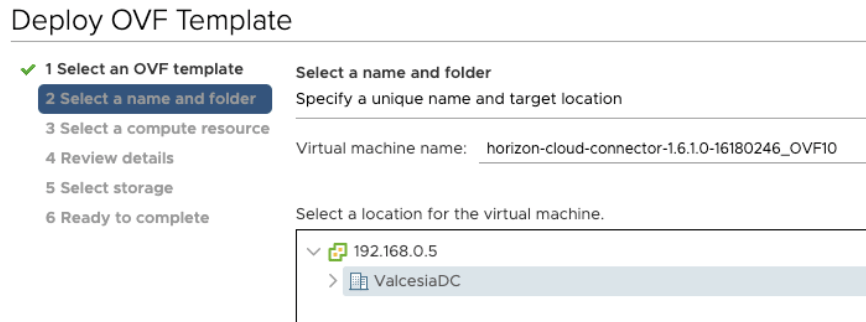
Select the OVF file you’ve downloaded from MyVMware portal.

Type the appliance name and select location in here
Select the compute resource to be used by Horizon Cloud Connector

Review details

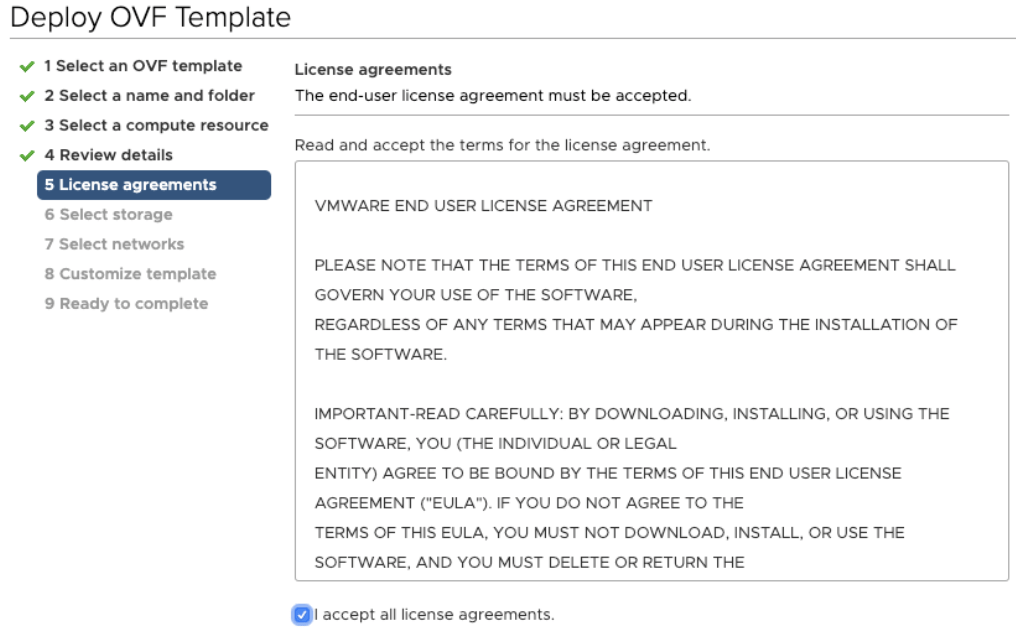
Accept license agreements
Select your VMware Storage Policy

Select Network

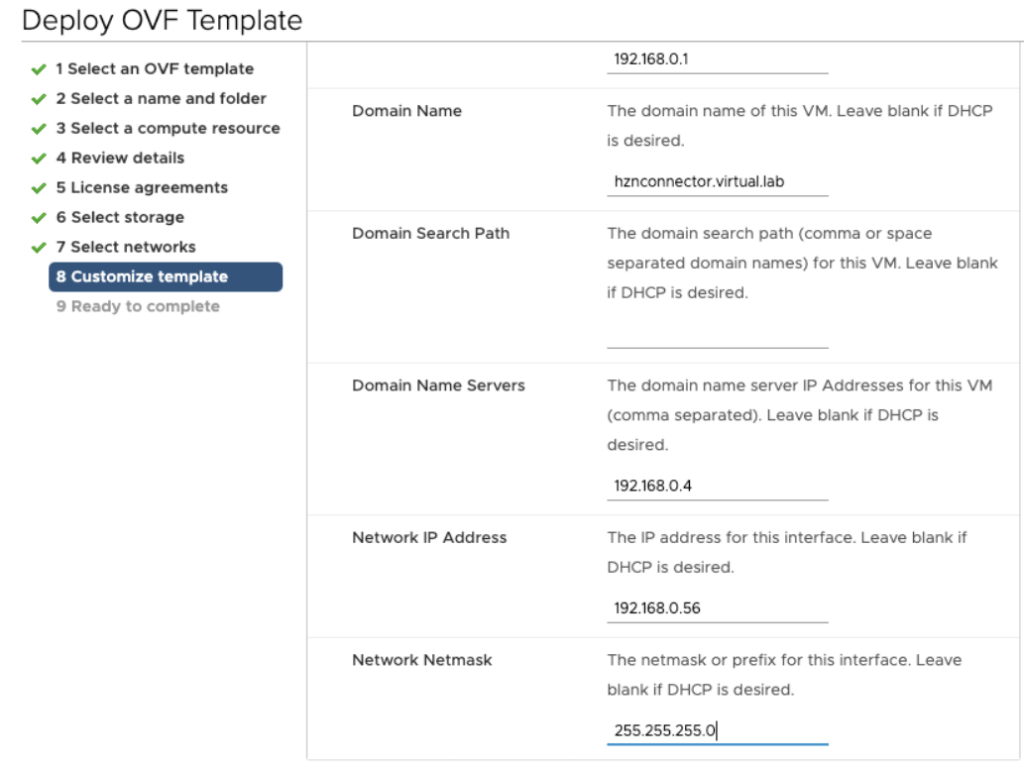
Customize your template with Root Password, Proxy information and Networking Properties

Note: If you will not use Proxy and will configure it using Firewall Rules, you can leave Proxy information in blank.
Review your settings and start deployment

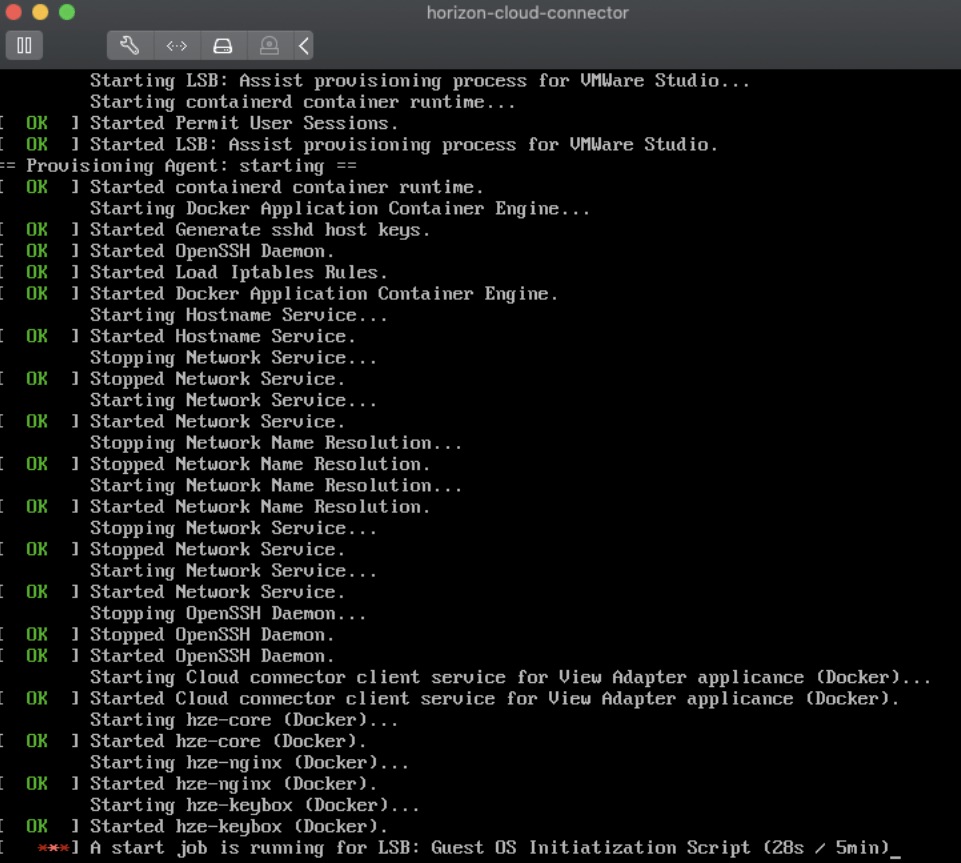
Once it’s deployed, start your Horizon Cloud Connector

It can take a while to finish some configurations.
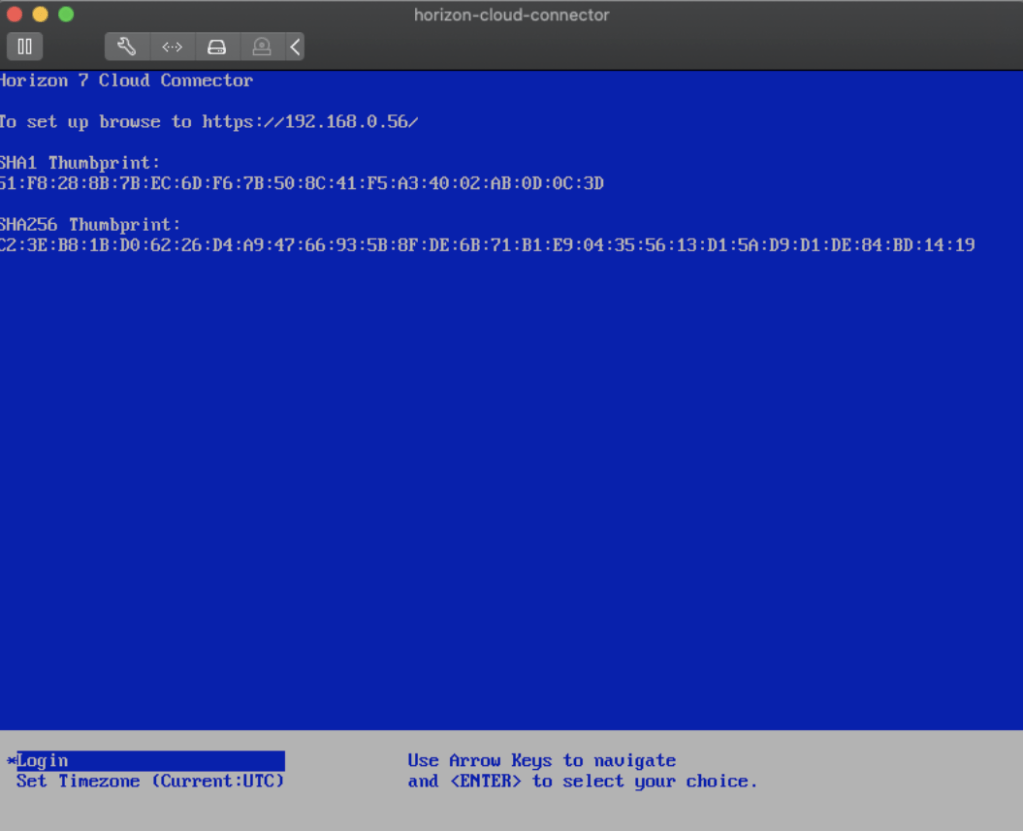
When the configuration finishes, the following screen will be blue with information about our next step

Excelente Articulo Kaka, un abrazo.
LikeLike