VMware AirWatch Admin Assistant
When you’re adding an internal application for macOS, right after you upload the file, you can see the information below to generate a metadata file (.plist) using VMware AirWatch Admin Assistant for macOS and upload it into VMware Workspace One UEM console.

If you click on the link, you can download it directly from Console or getting it from following URL:
https://awagent.com/AdminAssistant/VMwareAirWatchAdminAssistant.dmg
Once you have it installed, you can see the following Application into your macOS:

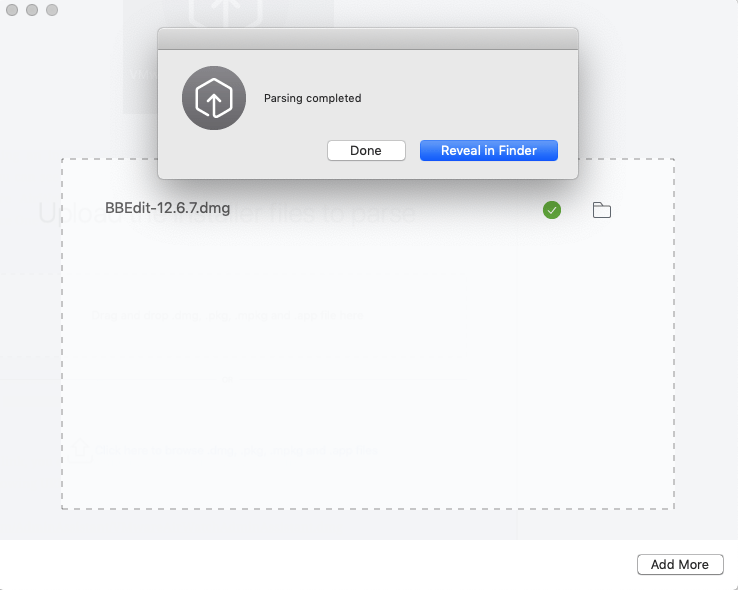
The only steps you need to do is upload your application installation supported file (dmg, pkg, mpkg and app) and it will generate the following files for you in Finder:
- .dmg file
- .plist file
- .png file

For many use cases, you can only use VMware AirWatch Admin Assistant to upload your application into Workspace One UEM. But, for other reasons, if an application gets a new version, you need to upload it again into VMware Workspace One UEM console and send an update to your computers. For that reason, many customers need to use AutoPkgr in order to streamline this upload and update process.
So if this is your case, follow the steps below in order to configure your application using AutoPkgr with Munki:
AutoPkgr
If you’re a command line lover, probably you’ve already listened to AutoPkg command, which does more than AutoPkgr, which is the GUI version for you to use and supported by GitHub repositories. Check this very good resource to learn more about AutoPkgr.
In order to start, you need to install it on your computer. Download the latest version of AutoPkgr using the following URL:
https://github.com/lindegroup/autopkgr/releases
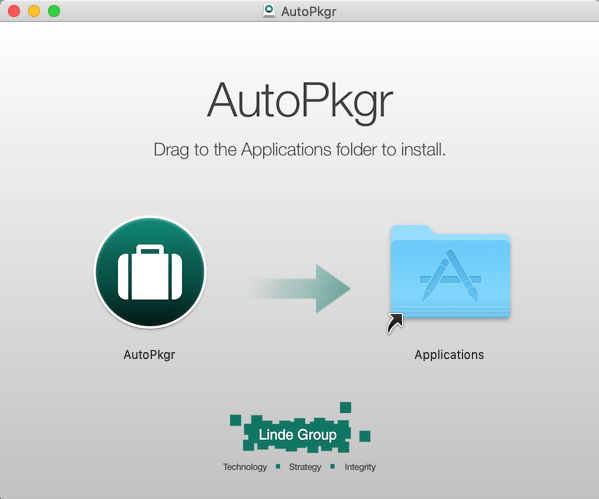
You can follow as a common .dmg application to be installed, dragging and dropping the AutoPkgr into Applications folder, following the screenshot below:
Install Tab
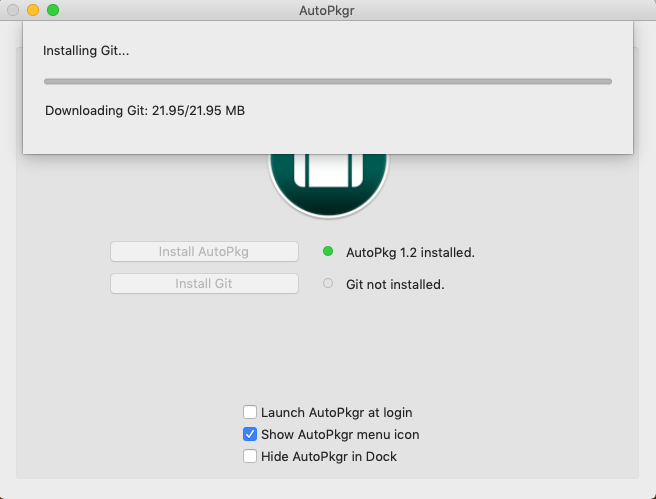
When you open the AutoPkgr, you can see the following:
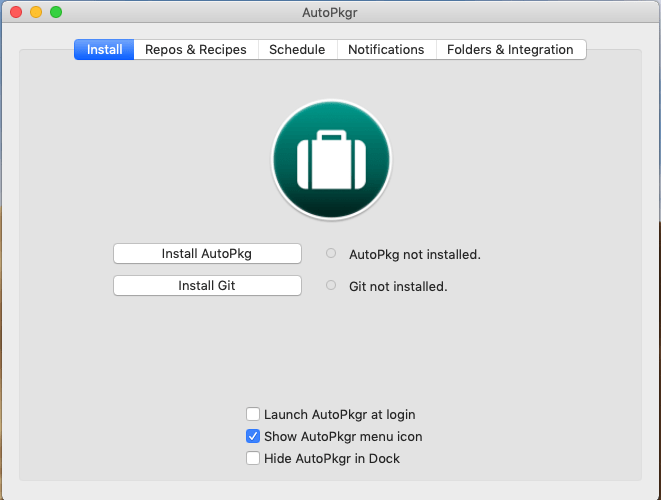
Let’s start configuring AutoPkg:
- Click on Install AutoPkg

- Click now to Install Git
Note: This is mandatory to install both in order to work with AutoPkg
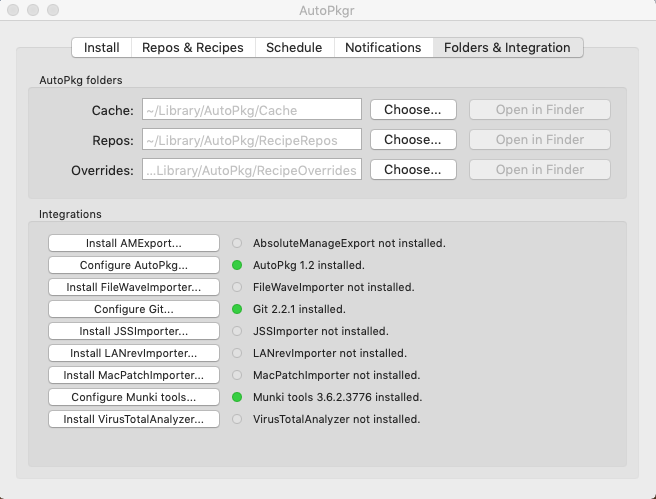
Folders & Integration
Next step, let’s configure the Folders & Integration tab. At this point, you will see only two green integrations: AutoPkg and Git.
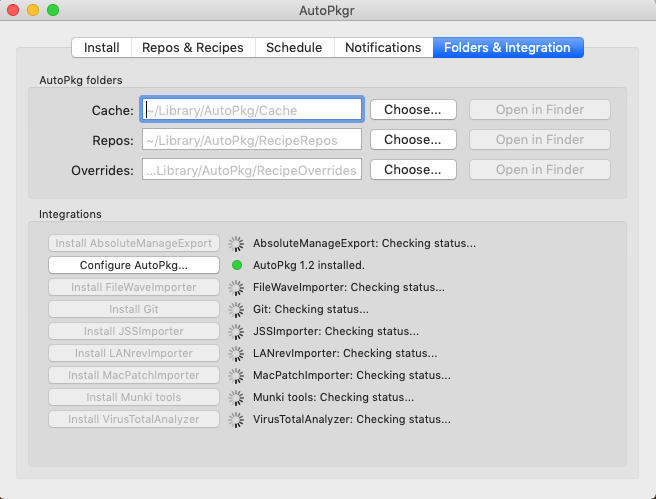
We need to configure Munki tools using this integration so, click on it right now:
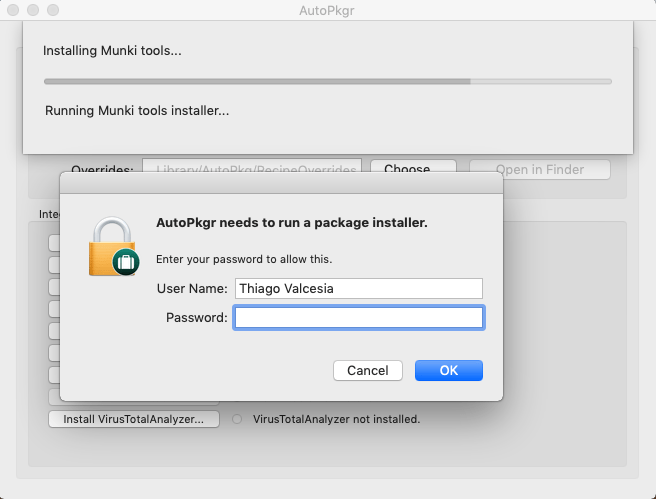
Note: Some actions you may receive the password to allow this package to be installed in your macOS.
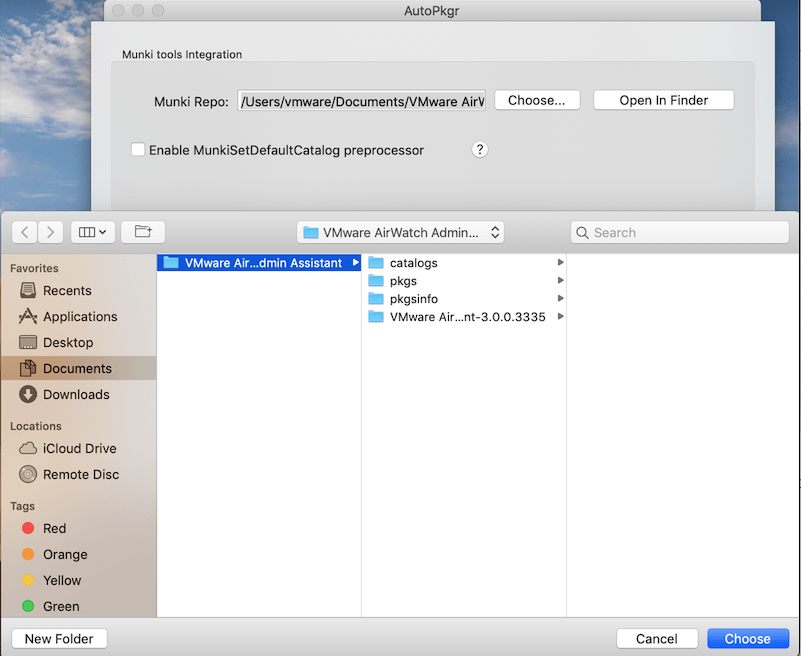
By default, AutoPkg start configuring a default cache, repository and Overrides, which are:
- /Library/AutoPkg/Cache
- /Library/AutoPkg/RecipeRepos
- /Library/AutoPkg/RecipeOverrides
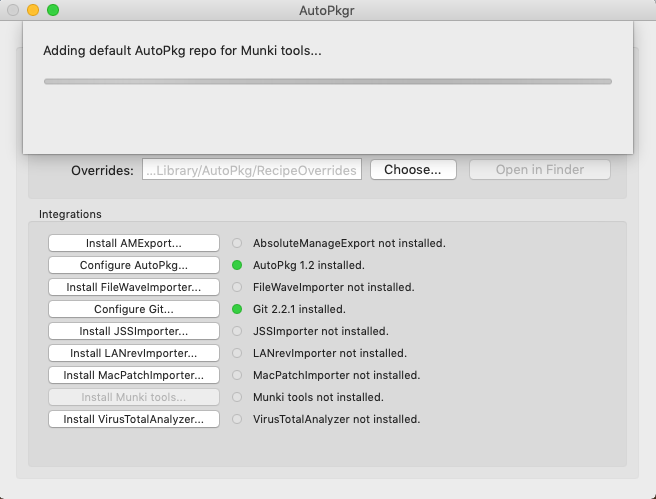
Note: If you’re using VMware AirWatch Admin Assistant, I strong recommend you to configure Munki tools and point to the following folder, save it and close:
/Documents/VMware AirWatch Admin Assistant
Repos & Recipes
When you’re configuring this tab, you can search for your repository (clone url) and also recipes for the application you’re working with.
To make it easy to understand:
- Recipes allows you to build a deployable package on your environment
- Repos allows you to storage the information in recipes to be used.
As an example, let’s work with Google Chrome to create a package:
- Search for Google Chrome into recipes search box
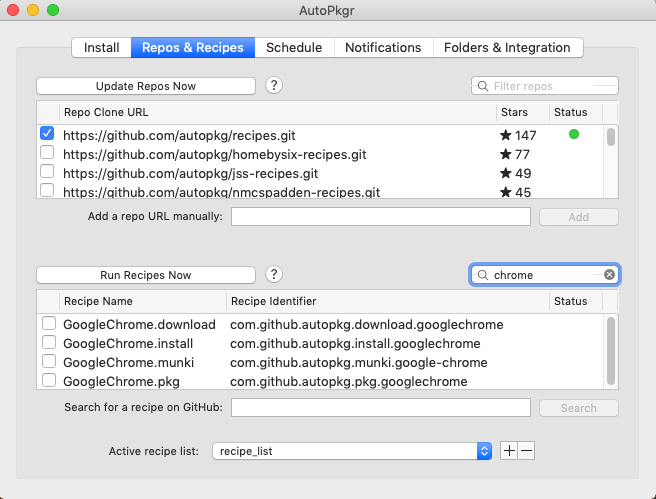
- You can see that’s some recipes showing and one specific is written GoogleChrome.munki. This is the one we’re using. The reason why is simple: we have the pkginfo plist from this recipe.
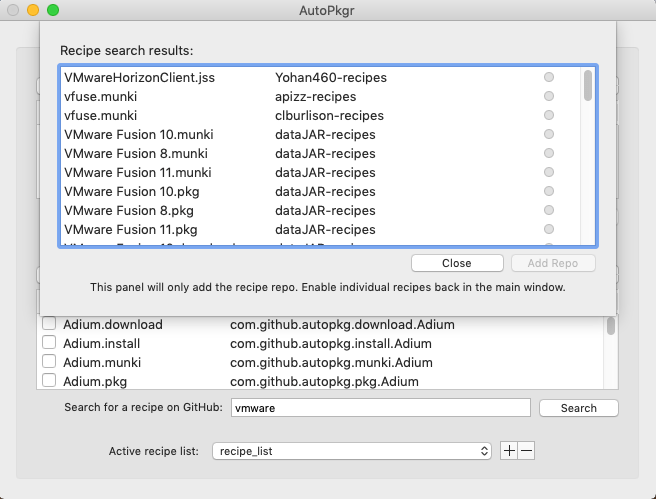
- If you cannot see your recipe under Run Recipes Now, you can search for a recipe on GitHub, like I did using the word vmware:
- When you have selected the recipe properly, now it’s time to hit Run Recipes Now button:

After finish the run recipes process, you can get the following files into VMware Admin Assistant folder, according screenshot below:
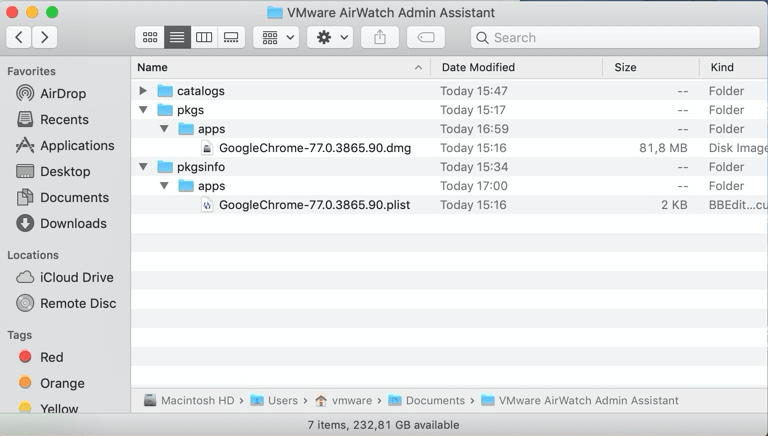
You can see that both files we need (.dmg and .plist) are created successfully.
Not it’s time for you to upload them using VMware Workspace One UEM console, the same way you do.
Possible Error: Fail_Recipes_Without_Trust_Info
If you followed all the steps in here but you’re facing the following error:

The reason for this is related to verify and trust recipes you’re trying to run. You need to run the following command in order to make that happen, in my case were:
defaults write com.github.autopkg FAIL_RECIPES_WITHOUT_TRUST_INFO -bool NO
autopkg verify-trust-info -vv GoogleChrome.munki
autopkg make-override GoogleChrome.munki
autopkg update-trust-info com.github.autopkg
References
You can see this Blog which have important information about how to work with AutoPkgr and this Site which also explaining how to handle Trust info using recipes, what are the differences between AutoPkg and AutoPkgr, if you want to know more about AutoPkg, etc.
Enjoy it!
