
There are a plenty of use cases when you configure AuthN and AuthZ using your Workspace ONE Access and sometimes, there must be a special setting to address specific cases. A customer of mine need to move to Red Hat SSO (RH-SSO) (or Keycloak – an Open Source identity and access management solution which I’m using when I created this blog entry).
Check it out the AuthN flow to be used on this scenario:

Steps:
- User hits Workspace ONE Access URL Portal
- HTTP Redirect to the SAML IDP configured
- AuthN is done using IDP defaults (LDAP, MFA, etc) and SAML Response is sent back do Workspace ONE Access
- AuthZ is sent to Workspace ONE Access and customer access portal
So let’s check how to set this up:
Requirements:
- Workspace ONE Access
- Configured with Active Directory domain
- Users / Groups synchronized using Workspace ONE Access Connector
- RH-SSO / Keycloak
- Realm properly configured
- User Federation configured with your Active Directory domain
Download Your Workspace ONE Access Service Provider XML
Besides you can configure it manually, let’s get use of XML file to make this configuration smoother. So access your Workspace ONE Access environment and follow the steps below:
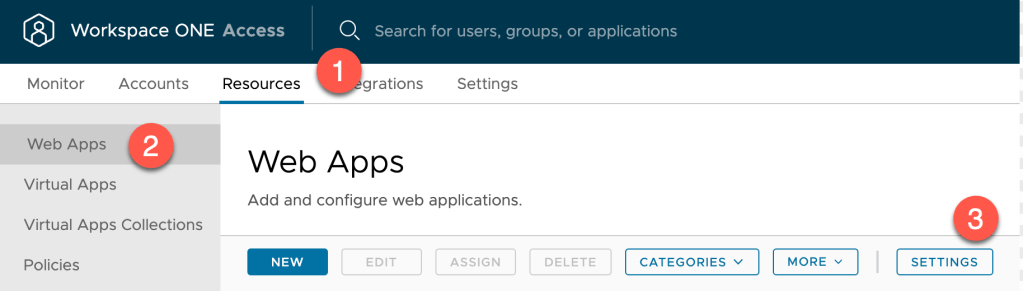
- Click on Resources
- Click on Web Apps
- Click on Settings
- Select SAML Medatada, right click on Service Provider (SP) metadata and Save Link as…
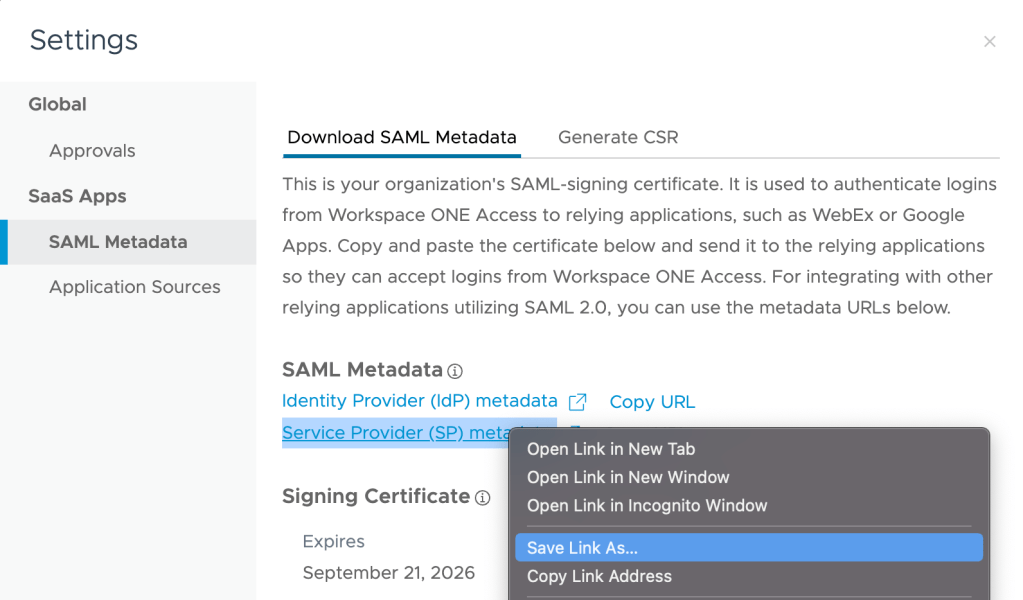
Save it as SP.XML into your Desktop / Download folder to be used in.

Let’s Start with RH-SSO / Keycloak Configuration
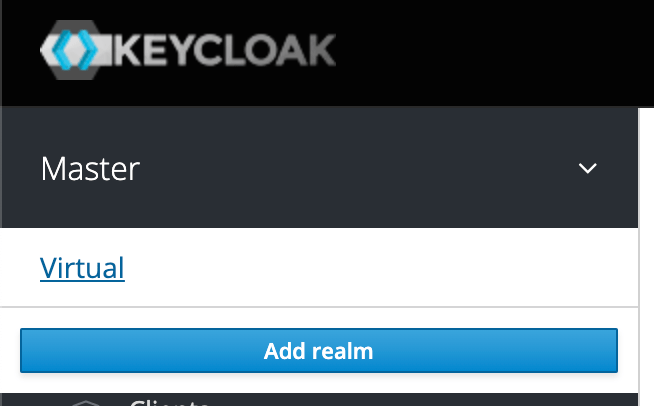
First and foremost, we need to select REALM properly so, log into your Administrative Console and select your Realm.
Select the REALM you need to configure
Configure a new CLIENT entrance to be pointed to your Workspace ONE Access environment

Click on Create

Click on Import and let’s select the SP.XML file we download from previous steps
Note: You don’t need to change to SAML because it will be changed properly after reading file.

After selecting the SP.XML file, the following configuration will be set.

Right after you click on Save, more configuration will be presented. We need to change a few thing to make it work perfectly:

Let’s keep default configuration and change only the following item: Client Signature Required ==> OFF

After that, scroll down and SAVE it.
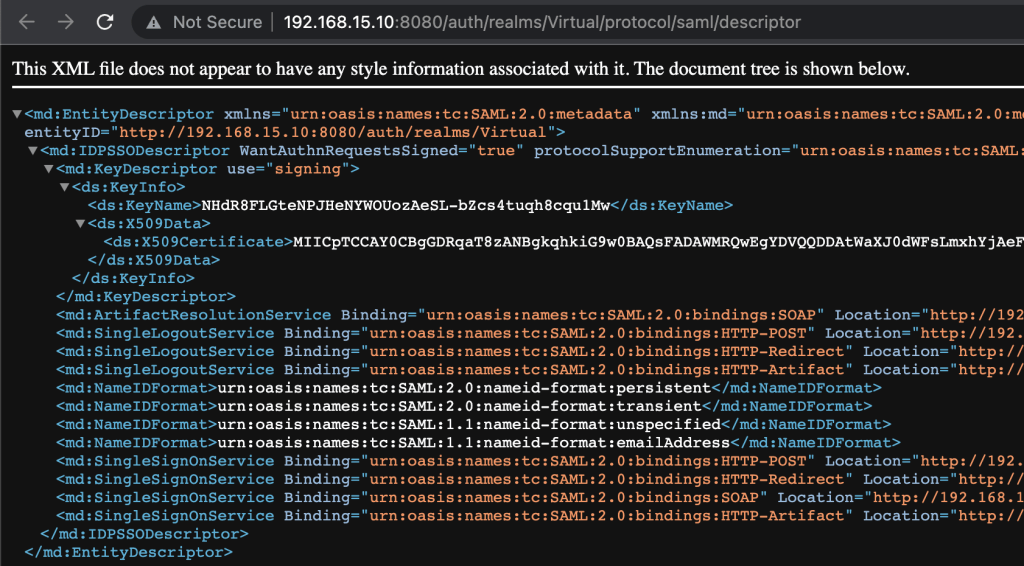
Download RH-SSO / Keycloak SAML Endpoint Configuration
Now it’s time to get all RH-SSO / Keycloak configurations to be used into Workspace ONE Access.
On Administration Console (http://YOUR_SERVER:8080/auth/), click on Realm Settings, under General, select SAML 2.0 Identity Provider Metadata.
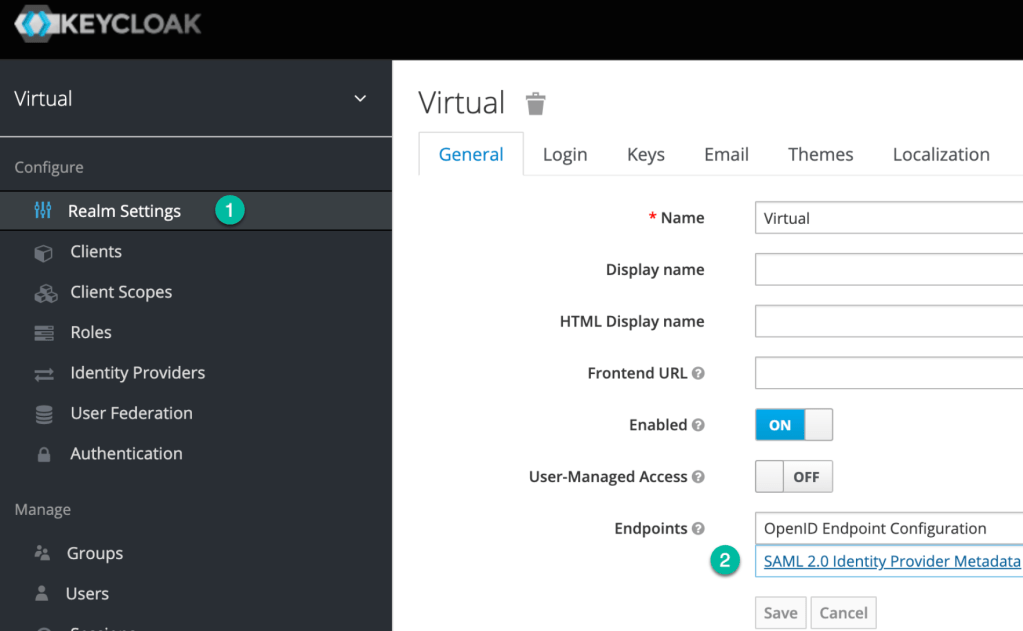
The following tab will open with all XML settings we will need to import into Workspace ONE Access. Leave it open (or save it on your computer as well).
Configure Workspace ONE Access with a New SAML IDP
Now it’s time to add a new SAML IDP into Workspace ONE Access.
Go to Integrations, Identity Providers.

Click on Add Identity Provider and select Create SAML IDP.

Give your SAML IDP a name to make it easy for you to select it afterwards. In my case Keycloak.

Now it’s time to copy all the content from SAML 2.0 Identity Provider Metadata (RH SSO / Keycloak). (Remember we have this tab already open?)
Note: Whether you saved into your computer, just open it using a TextEditor to copy all content to use on the following steps.
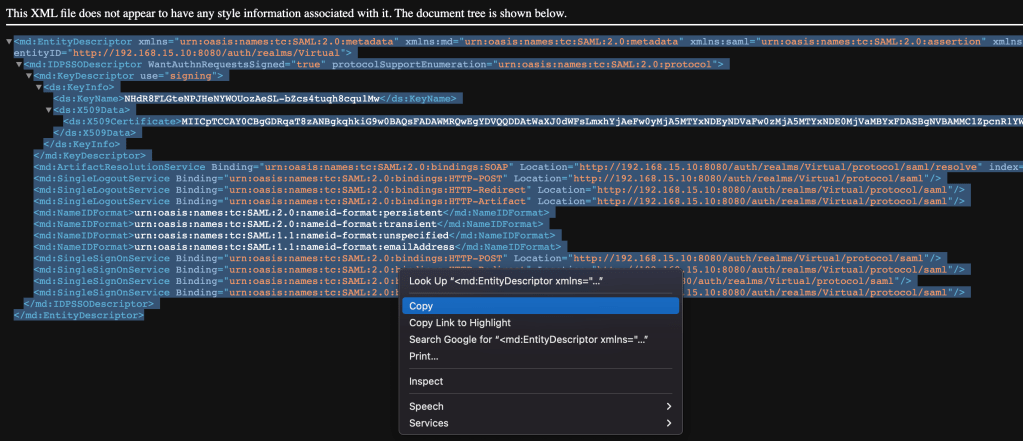
Paste it into SAML Metadata field and click on Process IdP Medatada

You’ll notice Name ID Format, Name ID Value were populated accordingly.
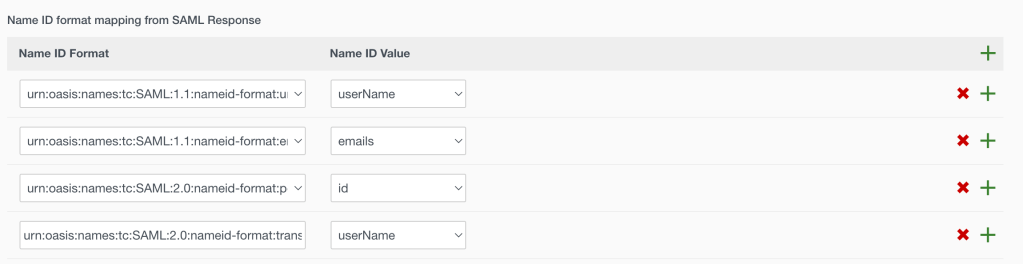
Change Name ID Policy in SAML Request to urn:oasis:names:tc:SAML:1.1:nameid-format:emaillAddress

Select your Domain

Select Network Range properly

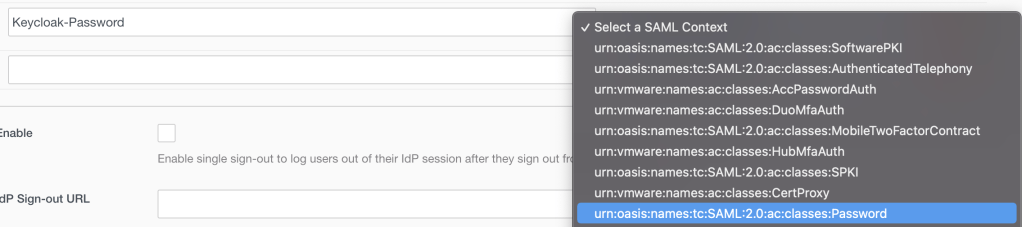
Add a name do identify your Authentication Method (e.g.: Keycloak-Password). This will be used afterwards on Policy definition.
Select urn:oasis:names:tc:SAML:2.0:ac:classes:Password as SAML Context
Alter it all, click SAVE button

Configure Policies
Now that you have your Identity Provider properly set, it’s time to configure your Policy to use this AuthN Method as desired.
Click on Resources, Policies and let’s Edit your Default Policy (or the policy you would like to use on your environment):

Go to Configuration step and click on ALL RANGES (Web Browser as Device Type).

Select Authentication Method name you added to start using it as your new SAML IDP
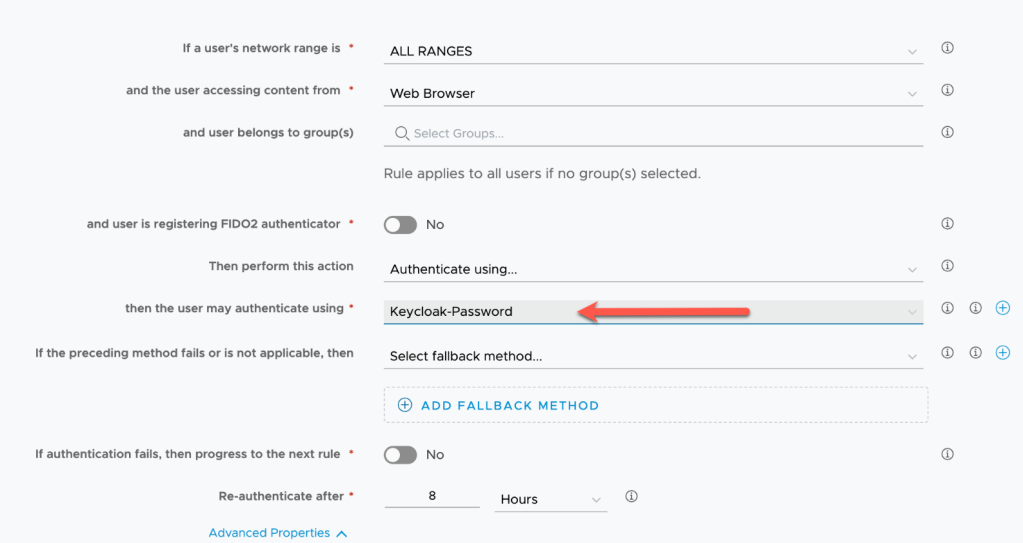
Hit save and let’s test it out.
Note: Try using an Incognito Browser for testing purpose.
Testing Configuration
I created the following video to demonstrate how this integration will work.
Did you like this configuration? Let me know what you think! I wish this can help you on your use case
Enjoy the ride!
